How to Create a Spice Rack for a Small Kitchen Wall

Adding a spice rack is an easy way to organize your seasonings while saving precious cabinet space. For kitchens with limited storage, installing a spice rack directly on the wall is a great solution. Selecting the right spot and style ensures your new rack not only looks great but also functions effortlessly in your cooking workflow.
Read on for tips to create the ideal wall-mounted spice rack for your small kitchen.
Step 1: Choosing the Perfect Spot
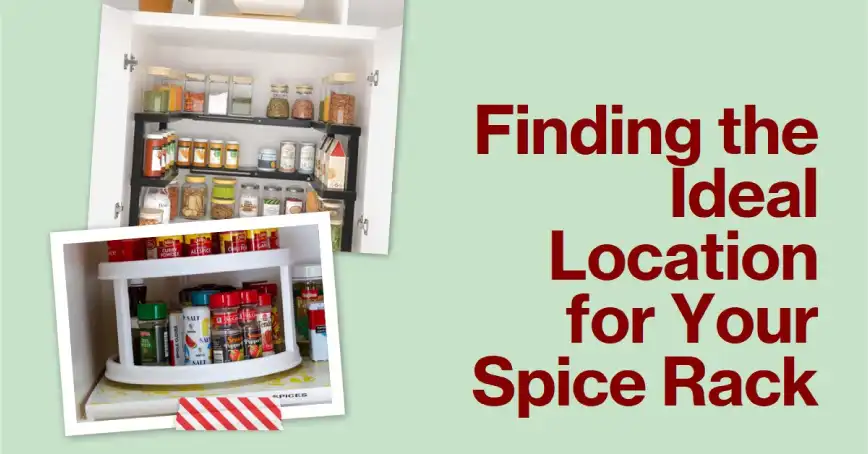
When selecting placement for your spice rack, consider convenience and visibility. Mounting near your main prep and cook area allows you to quickly access spices while cooking. However, avoid placing too close to the stove where heat and steam could damage labels and jars.
Look for a section of wall space at least 2 feet wide and 4 inches deep between countertops or appliances. Take into account proximity to outlets as you may opt for a wall-mounted light above the rack. Also, check for studs if using floating wall shelves that require anchors.
Ideally, choose a spot in your kitchen with ample lighting. This makes the jars easily visible and illuminates the labels for quick identification. Sunny spaces are perfect but install above the counter if direct sunlight could fade labels.
Step 2: Selecting a Storage Style
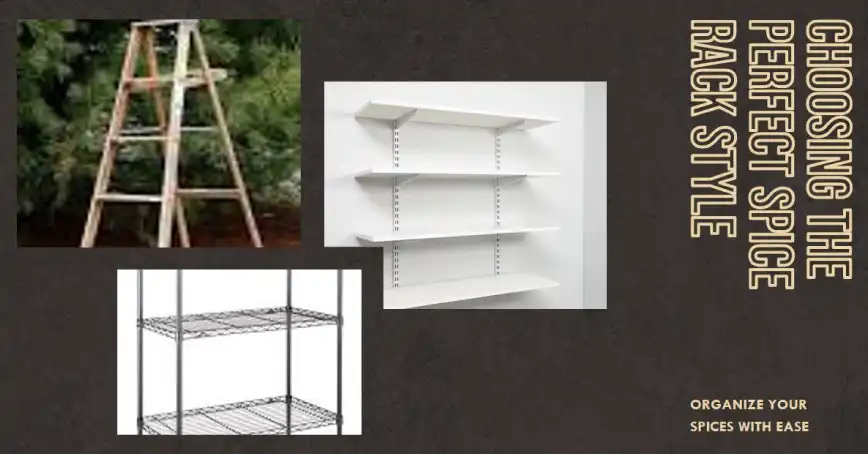
When it comes to storage options, you have several stylish ways to mount your spices. Consider the size of your collection and kitchen aesthetic when deciding on a design. Some top choices include:
- Mounted shelves – Floating wooden shelves are a simple go-to. Stain or paint to match your cabinetry and attach with brackets. Add small ledges to corral jars.
- Wire rack – Baskets add a modern, industrial vibe. Opt for stainless steel, black, or bronze metals. Keep spices in their original containers.
- Ladder – For farmhouse charm, try a miniature wooden ladder with jars hung from the steps with S-hooks.
- Magnetic strips – Adhere stainless steel magnetic strips to the wall and attach small tins. Keep your most-used spices closest.
- No matter the design, be sure to leave a bit of space between shelves or openings. Cramming everything too closely makes spices hard to see and grab.
Step 3: Gathering Supplies

Once you’ve selected the perfect spot and ideal rack design, it’s time to gather supplies. Having the necessary materials ready makes installation much smoother.
Here’s what you’ll need:
- Brackets, anchors, screws, and other hardware
- Tools like a drill, level, stud finder, and tape measure
- Jars, bottles, or tins for your spices
- Labels for identification
- Optional: Stain, paint, hooks, shelf liner
Take inventory of your spice collection and purchase any additional jars or tins needed to store them. Ensure you have labels on hand before transferring spices to the new containers.
Step 4: Installing Your Spice Rack
Now comes the fun part – installing your rack! Follow these steps for proper mounting:
- Locate and mark the wall studs using a stud finder. Mark where your brackets will go.
- Read the instructions and use suitable anchors and screws for your wall type. Pre-drill holes if needed.
- Attach shelf brackets or other mounting hardware. Check with a level that everything is even.
- For floating shelves, set shelves onto brackets. Mark and drill pilot holes before fastening them with screws.
- Add optional touches like staining, painting, or attaching shelf liner.
- Affix jars evenly spaced apart for optimal visual appeal.
- Transfer spices into containers and affix labels. Alphabetize spices for easy finding.
Troubleshooting Common Problems
While spice racks are relatively simple, you may encounter a few snags either during installation or over time. Here are some quick solutions to common issues:
- Brackets coming loose – Tighten screws into studs or use heavier-duty anchors.
- Shelf sagging – Tighten bracket connections. For floating shelves, ensure bracket spacing follows manufacturer instructions.
- Cluttered look over time – Review spices annually and discard any expired or seldom used ones.
- Jars slipping forward – Add shelf liner or small L-brackets as a barrier to hold jars in place.
With minor adjustments and proper care, you can resolve any problems that arise. This ensures your rack remains securely mounted and spices stay neatly organized.
Creative Spice Storage Solutions

While wall-mounted racks are likely the optimal choice for small kitchens, you can get creative if you have a bit more space to work with. Consider these unique spice storage ideas:
- A vertical garden spice rack – Use a small vertical garden planter mounted to the wall. Plant fresh herbs in some of the openings and use others to display spice jars.
- Geometric wall shelves – Build a geometric, zigzag shelf with diamonds and triangles to hold spices. Paint it a bright color to stand out.
- Retro metal racks – Attach colorful enamelware tins to a vintage-style metal rack with magnetic strips on the back. Go for a retro diner look.
- Shadow boxes – Arrange spices inside wall-mounted shadow boxes. Use risers to display them attractively. Add artwork behind the spices as decor.
- Wheels of spice – Mount wooden wheels vertically on the wall with dowels. Hang spice jars from the spokes of the wheel for a rustic feel.
Final Thoughts
Bringing order to your spice collection not only makes cooking easier but also improves the look of your kitchen. By thoughtfully selecting the ideal placement, mounting style, and containers, you can install a functional and beautiful spice rack even in the smallest of kitchens.
With your spices all in one place, you can say goodbye to rummaging and enjoy the simple convenience of one-stop seasoning. Get ready to unlock new depths of flavor in your dishes!