How to Install Filler Strips Between Cabinets?
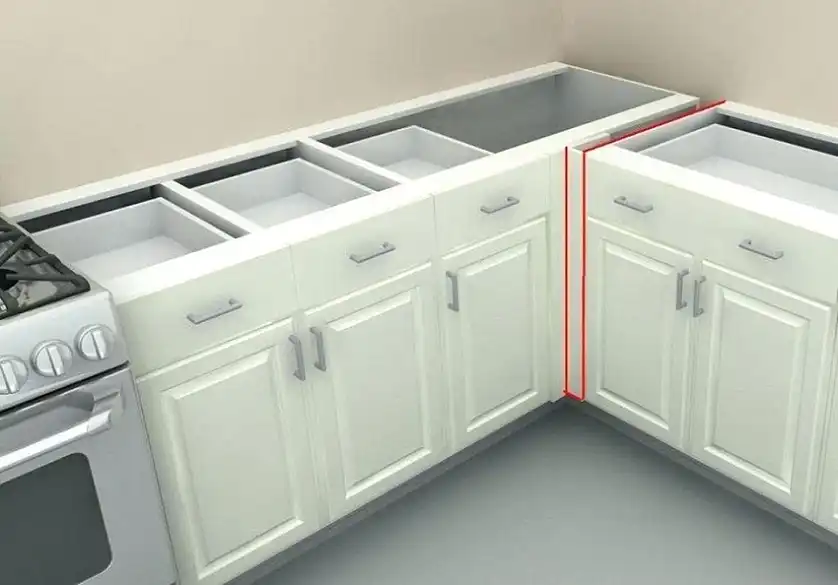
When installing cabinets, gaps can emerge between them and the walls, especially when walls are uneven or spaces are challenging to fit. Filler strips are a simple solution to these issues, helping you close gaps and create a smooth, custom look in your kitchen or bathroom cabinetry. In this guide, you’ll learn how to accurately measure, cut, and install filler strips to achieve a polished, built-in finish.
What Are Filler Strips?
Filler strips are slender pieces of wood or MDF that fit between cabinets and walls, ensuring everything lines up and looks intentional. They help you cover spaces left by irregular wall surfaces, avoid cabinet misalignment, and prevent drawer or door interference.
Types of filler strips vary based on where they’re used:
- Wall Fillers for gaps between cabinets and walls
- Corner Fillers to provide space between corner cabinets for proper door operation
- Overlay Fillers for a clean look on frameless cabinets
- Toe Kick Fillers to align cabinet bases and give a flush look
Each type has its function, but the installation steps generally follow similar methods.
What Tools and Materials You’ll Need to Install Filler Strips?
You’ll need a handful of tools and materials to make sure the installation goes smoothly. Here’s what you should gather:
| Tool | Purpose |
| Scribing Tool | Marks the filler for a precise fit against uneven walls |
| Cabinet Clamps | Holds the filler securely in place while installing |
| Drill | For attaching fillers to cabinets |
| Saw (Miter, Table) | For cutting the filler strips to size |
| Sandpaper | Smooths edges after cutting |
| Silicone or Caulk | Fills any small gaps for a seamless look |
Basic materials include wood or MDF filler strips, silicone, and sometimes L-brackets for extra support. If you don’t already have these on hand, your local hardware store should stock everything you need.
How to Prepare to Install Filler Strips?
Before attaching the filler strips, preparation is key to making sure they fit just right.
- Measure the Gap: Use a tape measure to determine the exact width of the space between the cabinet and the wall. Measure at several points vertically to catch any variations in wall shape.
- Cut the Filler Strip: Cut the strip to fit the height and width of the gap. It’s better to cut slightly oversized initially so you can sand down if needed.
- Scribe for Precision: Scribing is the process of marking the strip to match the wall contour. Hold the filler in place, then use a scribing tool to draw the wall’s shape onto the strip. This step is crucial if the wall has uneven spots.
- Sanding: Sand the filler strip for a smooth finish and to adjust the fit if needed. You want it to sit flush against both the cabinet and the wall.
- Test Fit: Before final attachment, hold the filler in place to check the alignment. Adjust as necessary, sanding down areas that may be too snug or misaligned.
How to Attach Filler Strip Between Cabinets?
Now that your filler strip is cut and scribed, it’s time to secure it.
- Mark Placement: Mark where the filler strip should be placed on the cabinet. This helps ensure everything lines up during installation.
- Attach the Filler: For wall fillers, secure the strip using screws, silicone, or glue. Hold the strip in place with a cabinet clamp as you drill in the screws. Clamps will stabilize the filler so it doesn’t shift.
- Corner Fillers: For corner fillers, use L-brackets or dowels to align the strip and keep it stable. This will prevent movement and ensure the filler stays flush over time.
- Alternative Methods: If you’re avoiding screws, you can use double-sided tape and panel adhesive instead. While screws offer the most secure fit, adhesives can work for lighter filler strips or where drilling isn’t possible.
- Shim if Needed: If the wall is noticeably uneven, consider using shims to fill small gaps behind the filler strip, ensuring it’s flush with the cabinet front.
Finishing Touches
Once the strip is attached, add some finishing touches to complete the look.
- Seal with Silicone or Caulk: Apply a thin line of silicone or caulk to fill any remaining gaps between the filler and the wall. This not only improves the appearance but also helps keep out dust.
- Aesthetic Tips: To make fillers look like part of the cabinet, paint or stain them to match the cabinets. This gives a built-in, professional finish.
- Clean Up: Wipe down all surfaces to remove dust, wood chips, or excess silicone, so the area looks clean and ready to use.
Frequently Asked Questions
Can I install filler strips without screws?
Yes, you can use double-sided tape or panel adhesive for light-duty fillers. However, screws offer more stability and durability.
How do I match filler strip color to my cabinets?
Most filler strips can be painted or stained. Choose a finish that matches your cabinet color and test it on a small area before applying.
Are there alternatives to filler strips?
Trim or molding can be a creative alternative to filler strips, especially if the gap is small or has an irregular shape.
What’s the best material for filler strips?
Wood is durable and easy to stain, while MDF is budget-friendly. Pre-finished strips work well if you prefer minimal prep work.

