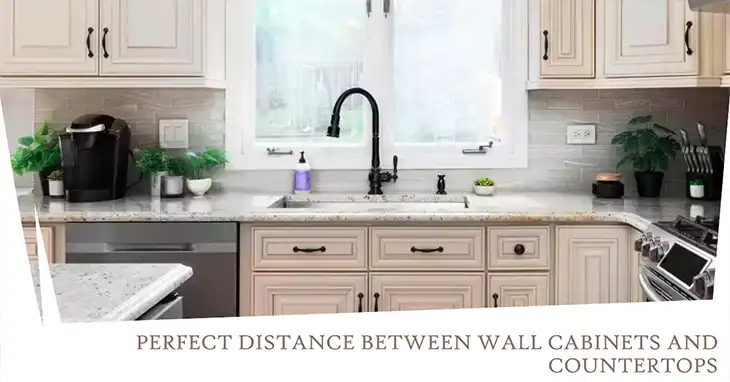
How to Attach a Countertop to a Wall Without Cabinets?
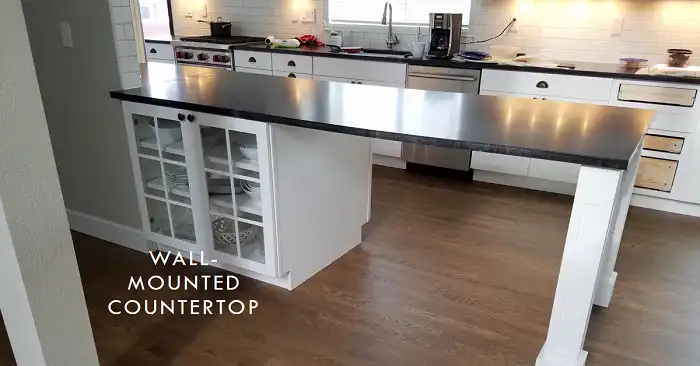
Attaching a countertop to a wall without cabinets is an increasingly popular choice for homeowners looking to maximize space or achieve a modern, minimalist aesthetic. This approach can transform small kitchens, laundry rooms, or basement bars into functional and stylish areas. The key to success lies in proper planning, selection of materials, and installation techniques. In this article, we’ll walk you through the entire process, from choosing the right countertop to adding the finishing touches.
How to Choose the Proepr Countertop for Wall Installation
The first step in your cabinet-less countertop journey is selecting the right material. Your choice will impact not only the look of your space but also the installation process and long-term maintenance.
When choosing a countertop material, consider the following:
- Weight: Heavier materials require more robust support systems.
- Durability: Some materials are more resistant to scratches, heat, and stains.
- Aesthetics: The countertop should complement your overall design scheme.
- Budget: Prices can range from $20 to $200 per square foot, depending on the material.
Common Countertop Materials
Here’s a comparison of popular countertop materials:
| Material | Weight | Durability | Cost per sq ft | Ease of Installation |
| Laminate | Light | Moderate | $20 – $50 | Easy |
| Butcher Block | Moderate | Good | $40 – $100 | Moderate |
| Granite | Heavy | Excellent | $40 – $200 | Difficult |
| Solid Surface | Moderate | Good | $35 – $100 | Moderate |
Laminate countertops are an excellent choice for DIY installations due to their lightweight nature and affordability. On the other hand, granite offers unparalleled durability but may require professional installation due to its weight.
How to Plan And Prepare for Countertop Installation
Proper planning is crucial for a successful installation. Let’s break down the key steps:
Measuring the Space
Accurate measurements are essential. Measure the length of the wall where you’ll install the countertop, and decide on the depth you want. Standard countertop depths range from 24 to 25 inches, but you can customize this based on your needs. Remember to account for any desired overhang, typically 1 to 1.5 inches.
Assessing Wall Strength
Before proceeding, ensure your wall can support the weight of your chosen countertop. A standard drywall on wooden studs can typically support up to 20 pounds per square foot. For heavier materials like granite, you may need to reinforce the wall or consult a structural engineer.
Gathering Tools and Materials
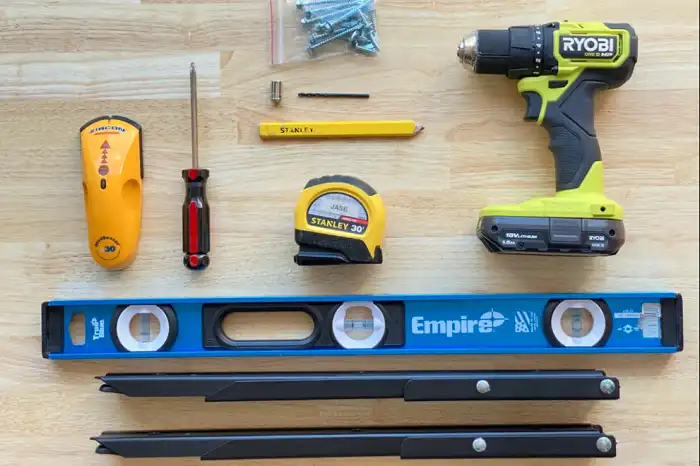
Here’s a list of essential tools and materials you’ll need:
- Safety gear (gloves, safety glasses, dust mask)
- Level (4-foot recommended)
- Stud finder
- Drill and appropriate drill bits
- Screws and anchors
- Saw (type depends on countertop material)
- Measuring tape and pencil
- Caulk and caulk gun
The specific materials needed will depend on your chosen support method, which we’ll discuss next.
How to Prepare the Wall and Support Systems
The key to a stable, wall-mounted countertop lies in proper support. Let’s explore the options:
Locating Wall Studs
Use a stud finder to locate the wall studs. Mark their positions clearly, as these will be crucial for attaching your support system. Studs are typically spaced 16 or 24 inches apart.
: Support Options
- Wooden Cleats and Braces: This method involves attaching a horizontal wooden cleat to the wall studs and adding vertical braces for additional support. Use 2×4 lumber for the cleat and braces. Attach the cleat to the studs using 3-inch wood screws, ensuring it’s level. Add vertical braces every 16 to 24 inches for optimal support.
- Metal Brackets: Heavy-duty metal brackets offer a sleek, modern look. Choose brackets rated to support at least 1.5 times the weight of your countertop. Install brackets every 16 to 24 inches, ensuring they’re securely fastened to the wall studs.
- Corbels: For a decorative touch, consider corbels. These can be both functional and aesthetic. Install corbels every 24 to 30 inches, depending on the weight of your countertop.
Reinforcing Non-Load-Bearing Walls
If you’re installing on a non-load-bearing wall, you may need to add reinforcement. Installing a header beam can distribute the weight more evenly. Always consult local building codes and consider hiring a professional for this step.
How to Install Countertop to A Wall
Now that your support system is in place, it’s time to install the countertop.
Preparing the Countertop
If necessary, cut the countertop to size using the appropriate saw for your material. For laminate, use a circular saw with a fine-toothed blade. For solid surfaces, a router or specialized cutting tool may be required. Always wear safety gear and work in a well-ventilated area.
Dry Fitting
Place the countertop on your support system to check for fit and level. Use shims if necessary to achieve a perfect level. Mark any areas that need adjustment.
Securing the Countertop
The attachment method will vary based on your countertop material:
- For wood or laminate: Use screws to secure the countertop to the support system. Pre-drill holes to prevent splitting.
- For solid surfaces: Use silicone adhesive or specialized brackets.
- For stone: Consult a professional, as special brackets and adhesives are often required.
Installing Backsplash
If you’re adding a backsplash, now is the time to install it. Choose a material that complements your countertop and use appropriate adhesive and grout.
Finishing Touches
Apply a bead of silicone caulk along the seam where the countertop meets the wall to create a watertight seal. If desired, install decorative trim or molding to hide the support system and create a polished look.
Special Considerations for Different Materials
Each countertop material has unique characteristics to keep in mind:
Laminate Countertops
Laminate is budget-friendly and easy to work with. When installing, be careful not to overtighten screws, as this can crack the laminate. Use edge banding to finish exposed edges for a professional look.
Butcher Block Countertops
Wood expands and contracts with humidity changes. Allow for this movement by using slotted brackets or leaving a small gap at the wall. Apply food-safe oil or sealer to protect the wood.
Stone Countertops
Due to their weight and complexity, stone countertops like granite or marble are best left to professional installers. They may require special reinforcement and precise cutting.
Solid Surface Countertops
These can be seamlessly joined for a continuous look. They’re heat-sensitive, so always use trivets for hot items.
Final Words
Installing a countertop without cabinets can dramatically transform your space, offering a sleek, modern look while maximizing floor area. By carefully choosing your materials, properly preparing your space, and following the steps outlined in this guide, you can successfully complete this project. Remember, when in doubt, it’s always wise to consult with or hire a professional to ensure a safe and beautiful result.
Frequently Asked Questions
Can you glue countertops together?
Yes, you can glue countertops together, especially when joining seams. For laminate countertops, use contact cement or specialized laminate seam adhesive. For solid surface countertops, manufacturers often provide specific adhesives designed for seamless joins. Stone countertops typically require epoxy adhesives. Always follow the manufacturer’s recommendations for the best results.
What screws should I use for countertops?
The type of screws depends on your countertop material and the surface you’re attaching it to. For wood or particleboard substrates, use #8 or #10 wood screws, 1 1/4 to 1 1/2 inches long. For attaching to metal brackets, use machine screws that fit the pre-drilled holes in the brackets. Always pre-drill holes in the countertop to prevent splitting.
How do you apply adhesive to countertops?
Clean both surfaces thoroughly and apply the adhesive in a continuous bead. For contact cement, apply to both surfaces and let dry before joining. On the other hand, for epoxy silicone, apply and join immediately. Use clamps or weights to hold the pieces together while the adhesive cures.
How long do countertops typically last?
The lifespan of a countertop varies by material. While quartz or granite countertops can last you a lifetime, laminate ones usually last anywhere from 10 to 20 years. Remember, proper care and maintenance can significantly extend the life of any countertop.